
You can process orders from more than 1 Actinic site by changing the current site being processed. Click on the Change Site button.

If using a local site you can select either the current Actinic site or specify a specific site. You can also choose to view order on an archived site.
If you want to access an Actinic site on another computer you should select the Remote Actinic site option. To be able to do this you must have access to a shared drive on the remote Actinic computer. To share a drive from the Actinic computer you should use explorer, select the drive (or directory) that Actinic is in (for example, C:\Program Files\Actinic v7) and select the share option. You will need to give full access to the remote drive.
NOTE: You don?t have to share the entire PC drive. You only need to share the Actinic directory (e.g. C:\Program Files\Actinic v7). One Stop Order Processing will find the Actinic sites in whichever drive you specify.
Once you have selected the shared Actinic folder (using the Select Shared Actinic Folder button) Order Processing for Actinic will attempt to find all the Actinic sites within that drive. For security you may only want to share the Actinic Ecommerce v6 directory (for V6). This is fine as Order Processing will look for all sites within the shared directory. Once the Actinic directory has been found, the available sites will be shown the Actinic sites directory. Select the site to use and press OK.
If you using Actinic V8 (or above) and using a Remote site
you need to share and connect to 2 Actinic folders. This is because Actinic
now stores the Actinic sites in a different location to the main program. One
Stop Order Processing requires access to both.
From the Actinic PC you need to share the following 2 folders:
C:\Program Files\Actinic V8
The location that you specify for the sites when installaing Actinic. For example,
C:\Users\Public\Documents\Actinic V8 (for Windows Vista).
TroubleShooting
If you are having problems accessing the remote
location or opening the remote Actinic database refer to the following:
Connecting to the remote computer
1. Make sure that you have given full access to the remote
computer. On Windows XP you should make sure that the Allow network users
to change my files option is checked. This is shown below:

2. If you can?t see your drive you should type in the exact path to your Actinic installation in the Actinic Location field. When this is correct this will then fill in the Actinic Sites field with the available sites.
Accessing the remote database
1 Are the computers both in the same domain or workgroup? If
they are in the same workgroup do the accounts on both machines with the same
name and password. If using a domain does the user have local administrative
rights on both machines?
2 The computers should be in the same intranet. If they aren?t (or you have a firewall in place) you may see an error similar to:

You should allow access to the remote computer by adding either the IP address or name of the remote machine into the trusted remote connections by doing the following:
a. Open Internet Explorer and open the Options (using Tools->Options). Select the Security tab.

b. Select the Local Intranet zone and press the Sites button.

c. Click on the Advanced button

d. Type in the IP address or computer name that you want to be treated as if it were in your local intranet.
If you are using a firewall you should make sure that the address of both machines is listed (and trusted) either side of the firewall (i.e. on each computer).
Using remote access with Order
Processing on Windows Vista
By default, Windows Vista restricts remote access
to the data folders. You should use the following instructions as a guide. This
will anyone who is on your local area network (LAN) to access your Actinic data.
If you require only cetain users to be able to access the Actinic data you should
consuly with your network Administrator (and replace the Everyone group access
with the specific users).
1 Display the properties of the folder to share (e.g. C:\Program Files\Actinic
v8), by right clicking the folder and selecting properties
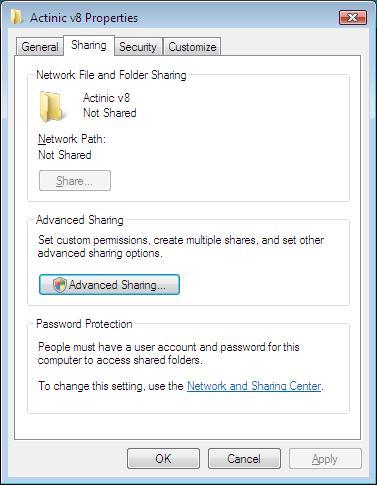
2 To allow access of the remote drive without additional
password user security you should click on the Network and Sharing Center
link (in the Password Protection section). This will display the following
dialog. You should click on the Password protected sharing down arrow and select
Turn off password protected sharing (and click the Apply button).
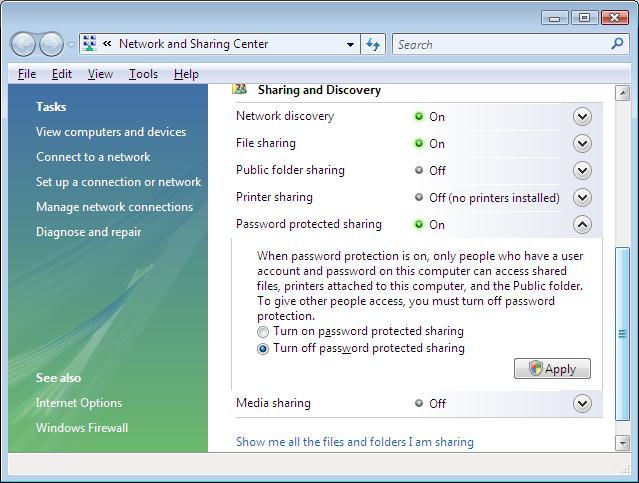
3 You now need to share this folder. Click on the
Advanced Sharing button.
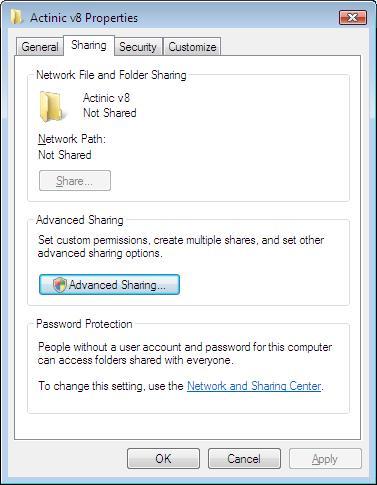
4 Tick the Share this folder option and click on
the Permissions button
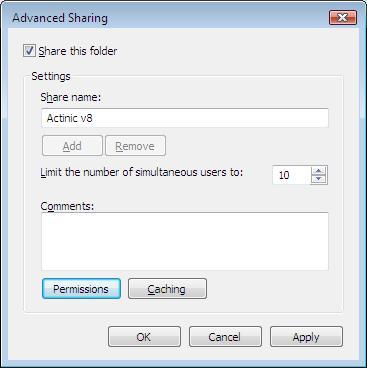
5 Tick the Full Control box under the Allow
option for the Everyone group. Press OK.
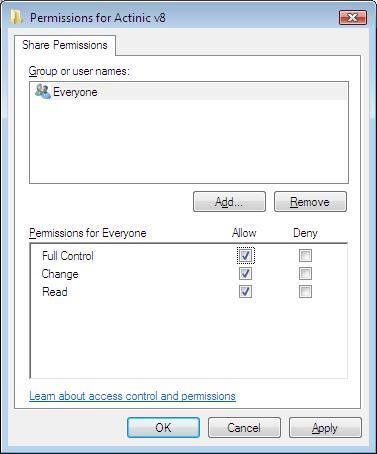
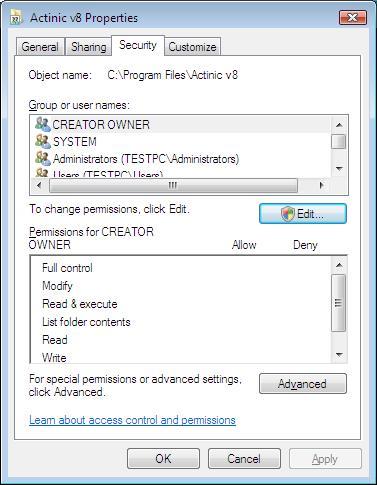
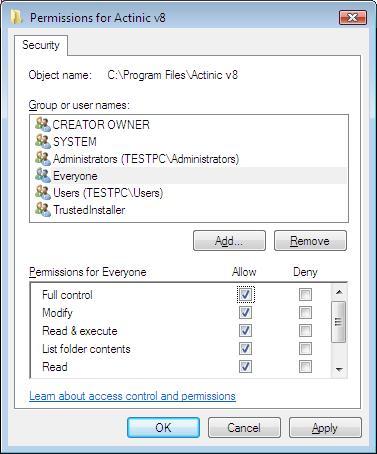
6 Then click on the Security tab on the folders
properties. Click
on the Edit button.
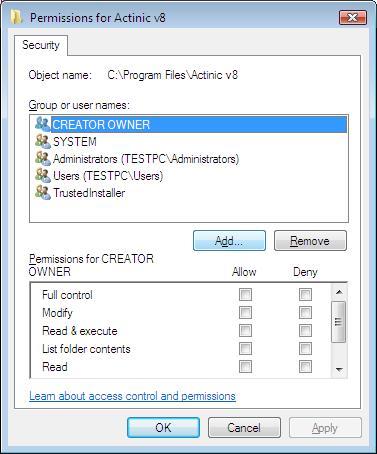
7 Click on the Add button.
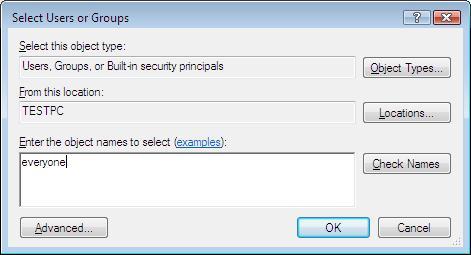
8 Type in everyone and click on the OK button.
9 Select the Everyone group and click on
Full control under Allow. Then click OK and then OK
the following dialog (to save and dismiss the properties dialog).
Mole End Software - Part of the Mole End Group |
|||||
| Products, plugins and utilities for Actinic Desktop and SellerDeck | All your orders, from all your systems, all together in one simple-to-use application | Integrated label invoice paper and free software packages and templates. Print your invoice and labels at the same time | Print Amazon Despatch Notes with a peel out label with the customer's details on directly from Amazon | Integrated Label Paper in Bulk, by the pallet. In Stock and ready for Despatch. | Print Ebay Invoices with a peel out label with the customer's details on directly from Ebay |