Using Royal Mail Despatch Manager Online (DMO) with Ebay, Amazon, SellerDeck, Shopify, Magento, osCommerce, BigCommerce, RomanCart, eBid, XCart, Oxatis, Groupon, Wowcher, Paypal, Cdiscount. ekmpowershop, Etsy, Flubit, OpenCart, PinnacleCart, PrestaShop, WooCommerce, Weebly, ChannelAdvisor, ASOS Marketplace, OnBuy, Mighty Deals , Mail Order and Telephone Sales
This feature is available in Professional, Premium and Enterprise versions of One Stop Order Processing
Using One Stop Order Processing Multi-Channel you can export all of your Ebay, Amazon, SellerDeck, Shopify, Magento, osCommerce, BigCommerce, RomanCart, eBid, XCart, Oxatis, Groupon, Wowcher, Paypal, Cdiscount. ekmpowershop, Etsy, Flubit, OpenCart, PinnacleCart, PrestaShop, WooCommerce, Weebly, ChannelAdvisor, ASOS Marketplace, OnBuy, Mighty Deals , Mail Order and Telephone Sales to Royal Mail Despatch Manager Online (DMO).
This guide will explain how to setup One Stop Order Processing and Royal Mail Despatch Manager Online (DMO). You will need our order processing software, available from https://www.1stoporders.co.uk. There is a 21 day free trial of the software. You will also need to signup to Royal Mail's service. More information at: http://dmo.royalmail.com.
Setting up One Stop Order Processing
If not installed you can download the software from https://www.1stoporders.co.uk/download/IL_OSOP.exe. The software includes a 21 day free trial.
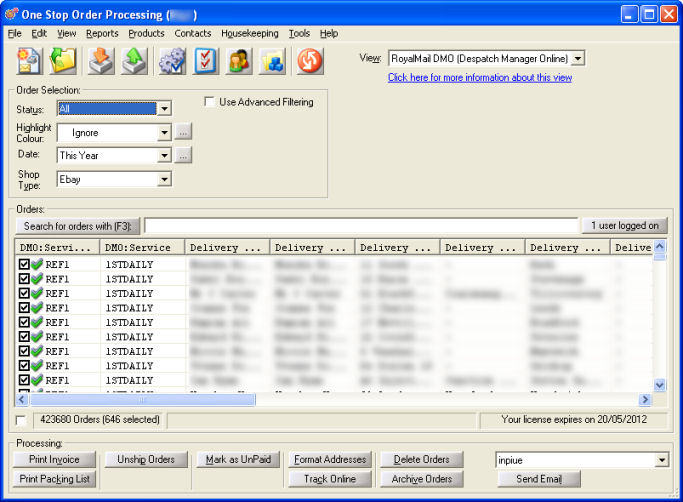
1 Make sure the RoyalMail DMO (Despatch Manager Online) view is installed. If it is go to item 2.
If the RoyalMail DMO (Despatch Manager Online) view is available you can go to item 2. If the view isn't available you should import the view. If it is installed into the installation folder (by default C:\OSOP\Main\RoyalMailDespatchManager.mev). If this is not available you can download it from here.
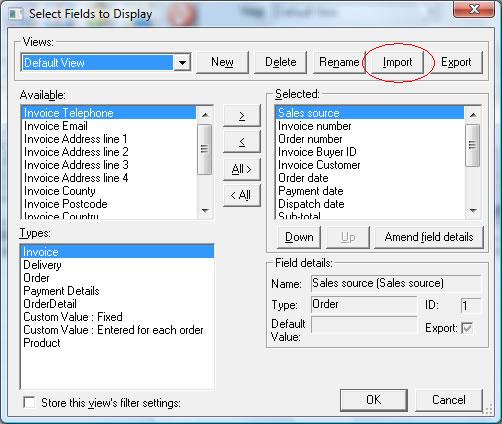
Once the view is on your PC you can import the view by clicking on the Customize Current View button ( ). To import the new view click on the Import button in the displayed window, shown below:
2 Tick the orders to export (using filters based on any fields shown, for example, unshipped orders).
3 Click on the Export Orders button ( ) and select the RoyalMail DMO (Despatch Manager Online) to create the CSV file to import into Royal Mail Despatch Manager Online (DMO), This is shown below:
4 This will create a CSV in C:\OSOP\ called DMO.csv. If required, you can change the name by selecting the RoyalMail DMO (Despatch Manager Online) View and selecting the View->Change Export Options menu option or click on the button to the right of the View selection field (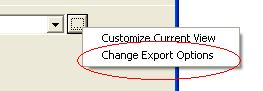 ). You can enter the correct output filename in the File to export to field. You can also add a comment to the order to show that this order has already been exported (and if required use this text as a filter to see which orders have not been exported to Royal Mail Despatch Manager Online (DMO).
Setting up Royal Mail Despatch Online (DMO)
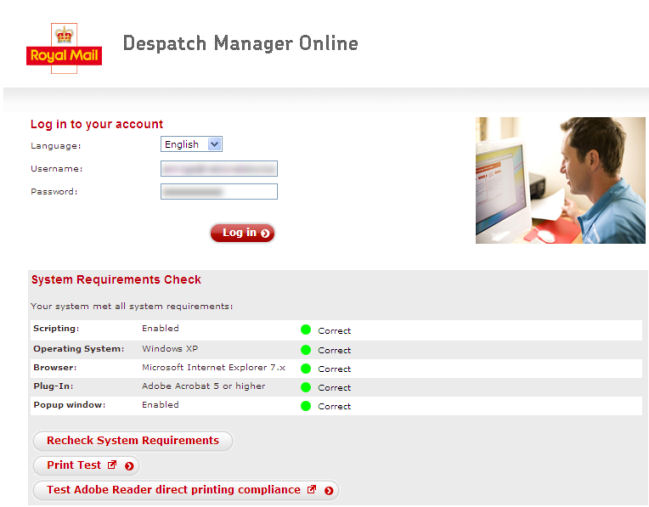
1 Go to the Royal Mail Despatch Manager Online website
at https://www.rmdmo.co.uk/login.epl and login using details provided by Royal Mail.
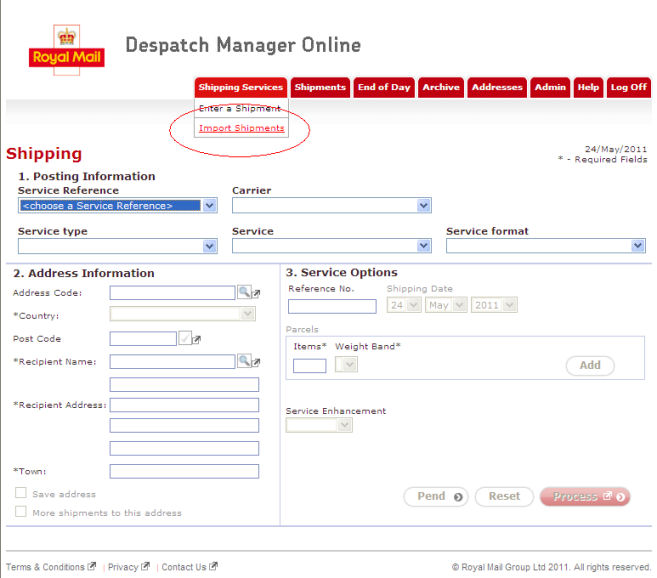
2 Under the Shipping Services menu option select Import Shipments, shown below:
3 If the 1StopOrders format is available go to item 10. If not follow the next steps to set the 1StopOrders format. On the Import Shipments screen select the New button, shown below:

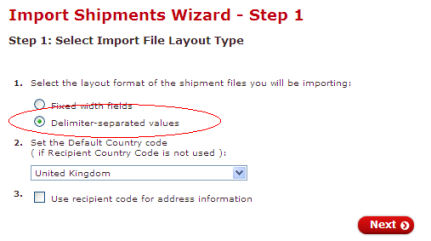
4 Select the import format as Delimiter-separated values and click on Next, shown below:
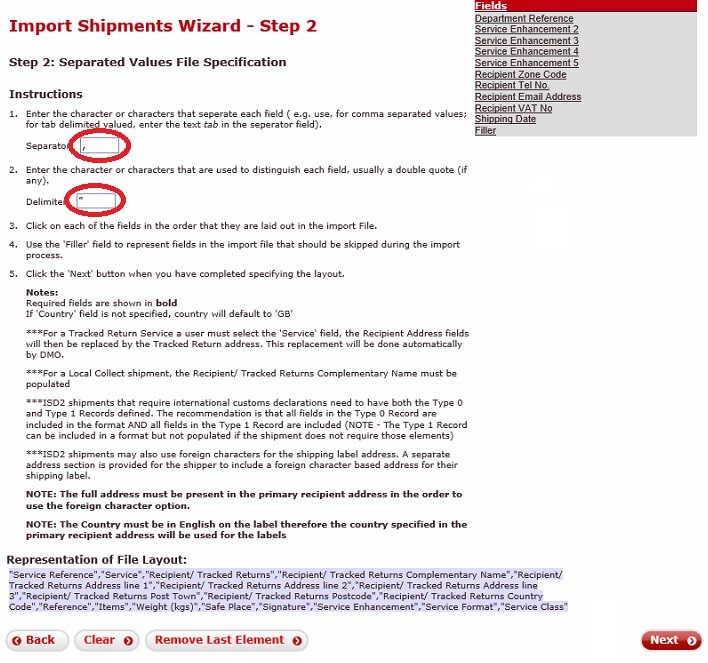
5 In the Separated Values File Specification make sure the Separator is set to a comma (,) and Delimiter of a double quote (").
You then need to click on the fields to use in the exact order that will appear in the file. If you click on the fields in the Field area in the order shown below:
Service Reference
Service
Recipient/ Tracked Returns
Recipient/ Tracked Returns Complementary Name
Recipient/ Tracked Returns Address line 1
Recipient/ Tracked Returns Address line 2
Recipient/ Tracked Returns Address line 3
Recipient/ Tracked Returns Post Town
Recipient/ Tracked Returns Postcode
Recipient/ Tracked Returns Country Code
Reference
Items
Weight (kgs)
Safe Place
Signature
Service Enhancement
Service Format
Service Class
This will product the following in the Representation of File Layout area:
"Service Reference","Service","Recipient/ Tracked Returns","Recipient/ Tracked Returns Complementary Name","Recipient/ Tracked Returns Address line 1","Recipient/ Tracked Returns Address line 2",
"Recipient/ Tracked Returns Address line 3","Recipient/ Tracked Returns Post Town","Recipient/ Tracked Returns Postcode","Recipient/ Tracked Returns Country Code","Reference","Items","Weight (kgs)","Safe Place","Signature","Service Enhancement","Service Format","Service Class"
This is shown below. When the information looks correct click on Next.
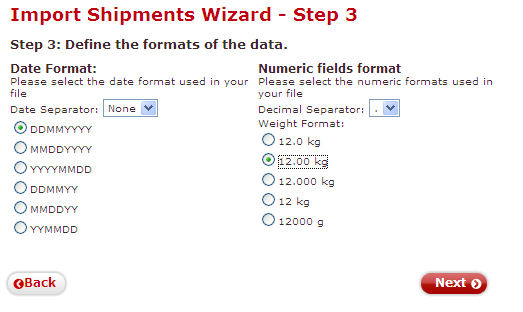
6 Ignore the Date Format as this field is not used. Change the Weight Format to the same format that you use for your product weights. For example, if you use kilogrammes select the 12.00 kg option. Click on Next. This is shown below:
7 You can now setup the mappings to your Royal Mail Services. You can use the exact text that they use (or their default mappings). The mappings provided in the guide have been used to make it easier to use Macros in One Stop Order Processing where different service enhancements and services are needed for different orders.
To add the different mappings
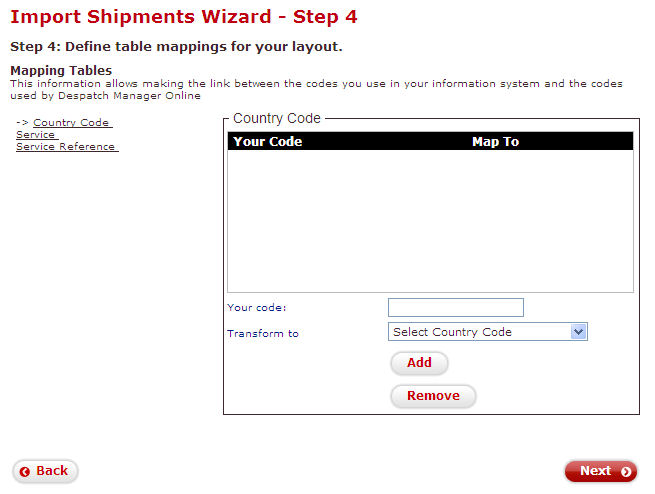
a Click on Service, Service Reference, Service Class, Service Enhancement or Service Format on the left hand side of the window
b For each mapping table add each of the mappings shown below (if available). To add a mapping type in the code in the Your code box and select the value in the Transform to box and click on Add.
Each of the mappings for the relevant fields is shown below in a table with how the windows should look after adding the mappings. If you make a mistake you can click on the Remove button and reenter the mapping (or click on an item to amend it).
Country Code
The country codes do not need to be mapped as One Stop Order Processing produces the correct codes.
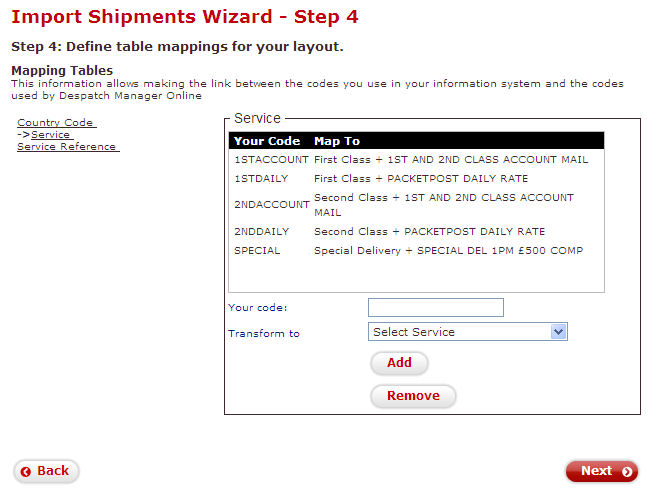
Service
|
Your Code |
Map To |
| 1STACCOUNT |
First Class + 1ST AND 2ND CLASS ACCOUNT MAIL |
| 1STDAILY |
First Class + PACKETPOST DAILY RATE |
| 2NDACCOUNT |
Second Class + 1ST AND 2ND CLASS ACCOUNT MAIL |
| 2NDDAILY |
Second Class + PACKETPOST DAILY RATE |
| SPECIAL |
Special Delivery + SPECIAL DEL 1PM £500 COMP |
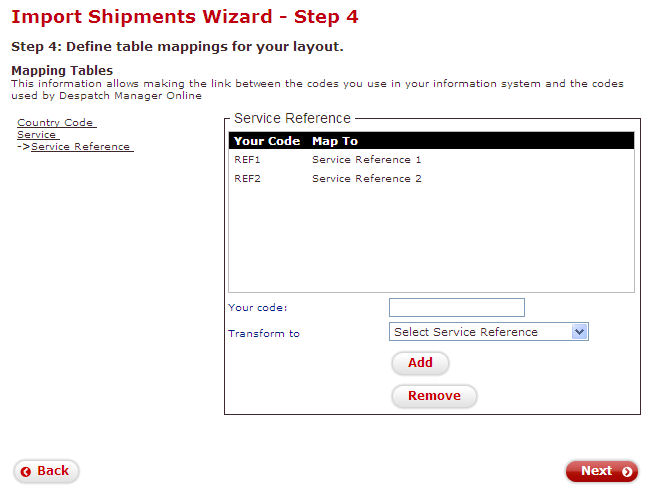
Service Reference
|
Your Code |
Map To |
Ref1
|
Service Reference 1 |
| Ref2 |
Service Reference 2 |
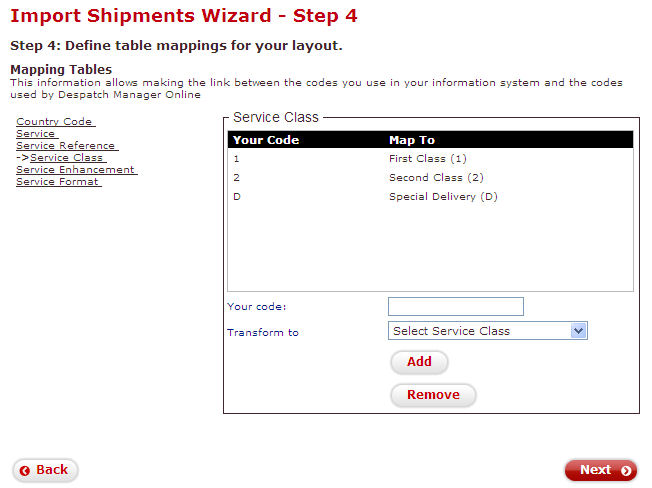
Service Class
|
Your Code |
Map To |
1
|
First Class (1) |
| 2 |
Second Class (2) |
| D |
Special Delivery (D) |
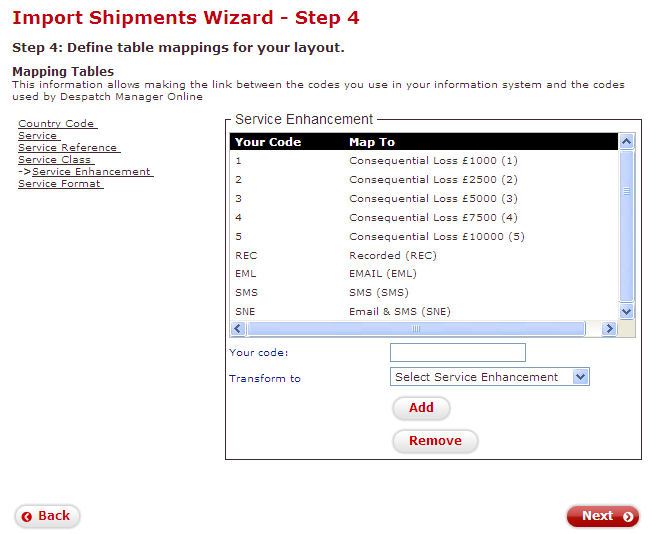
Service Enhancement
|
Your Code |
Map To |
| 1
|
Consequential Loss £1000 (1) |
| 2 |
Consequential Loss £2500 (2) |
| 3 |
Consequential Loss £5000 (3) |
| 4 |
Consequential Loss £7500 (4) |
5
|
Consequential Loss £10000 (5) |
| EML |
EMAIL (EML) |
| REC |
Recorded (REC) |
| SMS |
SMS (SMS) |
| SNE |
Email & SMS (SNE) |
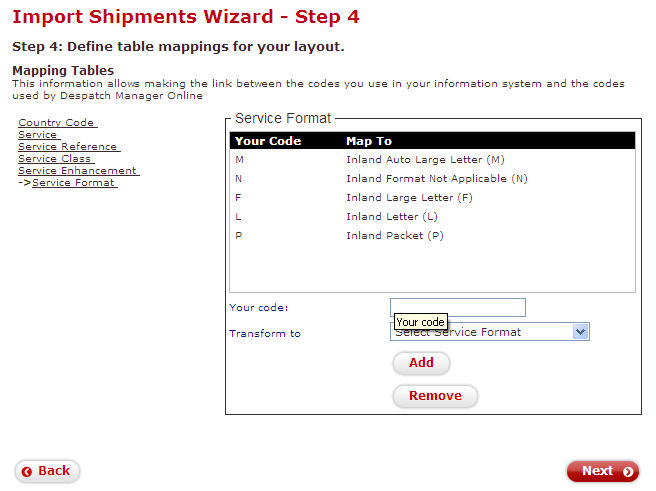
Service Format
|
Your Code |
Map To |
| F |
Inland Large Letter (F) |
| L |
Inland Letter (L) |
| M |
Inland Auto Large Letter (M) |
| N |
Inland Format Not Applicable (N) |
| P |
Inland Packet (P) |
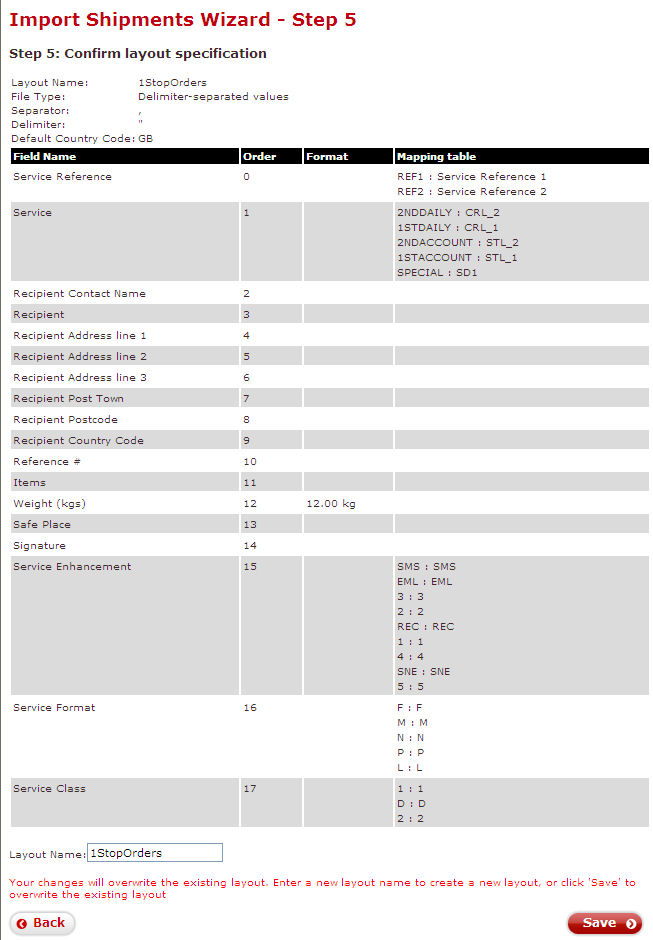
8 When the mappings have been added click on the Next button.
9 The following definition is shown below. In the Layout Name enter the name for the layout, 1StopOrders and click on Save. This is shown below:
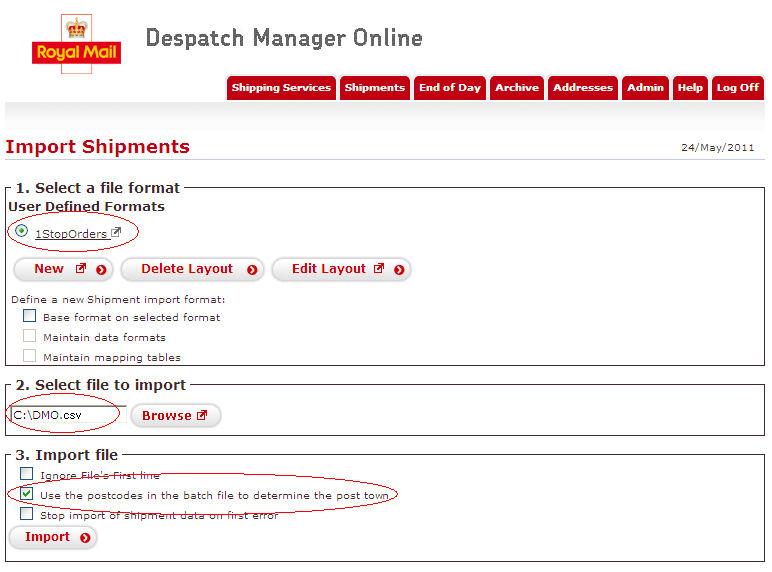
10 To import the delivery details for the orders:
1. Select a file format
Select the 1StopOrders format
2. Select file to import
Type in C:\OSOP\DMO.csv
3. Import File
Tick Use the postcodes in the batch file to determine the post town.
Click on the Import button.
This is shown below.
Setting up different delivery options in One Stop Order Processing
By default the view has options for
| Service Reference |
REF1 |
| Service |
1STDAILY |
Using the same value for all shipments
1 Amend the view (click on the Customize current view button ()).
2 Select the field to change Selected: box on the right hand side.
3 Click on the Amend field details button.
4 In the Amend field details window type the required value in the Default field value box and click on OK.
Using different values for shipments
You can amend on an individual order by amending the order and changing the value on the Custom Values tab.
If you want to automate this process you can use the following approach:
1 Amend the view (click on the Customize current view button ()).
2 Select the field to change Selected: box on the right hand side.
3 Click on the Amend field details button.
4 In the Amend field details window type the required macro in the Default field value box.
Example macros to use:
To use fields in the macros they must be added to the view. For example, you may want to check the total postage paid ([%Total P&P%]). To check this add this to the view. This can then be checked in a macro.
Use 1st Class post for orders that have paid £3.50
or more for shipping
Change the default value of the DMO:Service field to:
[%Total P&P%][<]3.5[1STACCOUNT][2NDACCOUNT]
Use International for overseas orders, 1st Class for orders with P&P less than 80p otherwise use RoyalMail Tracked.
Change the default value of the DMO:Service field to:
#GB#UK#[?][%DMO:Country Code%][[%Total P&P%][<]0.80[1STCLASS][TRA]][INTSF]
Change the default value of the DMO:Service Format field to:
#GB#UK#[?][%DMO:Country Code%][[%Total P&P%][<]0.80[F][N]][E]
Explanation of how the above macro works
In the above macros the DMO Country Code is checked to see if it is in #GB#UK#. If it is either UK or GB the ToTal P&P is checked and if less than 0.80 use 1st class otherwise use Tracked. If the DMO Country Code is not either GB or UK use International.
For information on how to setup macros click on the Help button or go to https://www.1stoporders.co.uk/1StopOrdersDefFF.html.